


Test setup & methodology
The test setting, the conditions recorded and how the results contribute to the score.
Show full testing methodology
Score Weighting
Weights express the scoring priorities, not how much each discipline actually changed the finishing order. The size of the performance gaps matters too. Category weights contribute to the overall score. Within each category, discipline weights divide that category’s share. Published finishing positions also need to be read alongside the editorial verdict.
| Test | Within category | Share of overall score |
|---|---|---|
| Dry · 39% | ||
| Dry Braking | 50% | 19.5% |
| Dry Handling | 50% | 19.5% |
| Wet · 56% | ||
| Wet Braking | 50% | 28% |
| Wet Handling | 50% | 28% |
| Comfort · 5% | ||
| Tyre Weight | 100% | 5% |
Our standard methods
The conditions above are recorded for this test. The descriptions below explain our standard procedures; measurement windows and run counts can vary by test.
Dry Braking
For dry braking, I drive the test vehicle at an entry speed of 110 km/h and apply full braking effort to a standstill with ABS active on clean, dry asphalt. I typically use an 100–5 km/h measurement window. My standard programme is five runs per tyre set where possible, although the sequence can extend to as many as fifteen runs if conditions and tyre category justify it. I analyse the full set of runs and discard statistical outliers before averaging. Reference tyres are run repeatedly throughout the session to correct for changing conditions.
Dry Handling
For dry handling, I drive at the limit of adhesion around a dedicated handling circuit with ESC disabled where possible so I can assess the tyre's natural balance, transient response, and limit behaviour without electronic intervention masking the result. I usually complete between two and five timed laps per tyre set, depending on the circuit, tyre type, and consistency of conditions. I exclude laps affected by clear driver error or obvious environmental inconsistency. Control runs are carried out frequently throughout the session, and I often use multiple sets of control tyres so that wear on the references does not become a meaningful variable. For more track-focused products, I also do endurance testing, which is a set number of laps at race pace to determine tire wear patterns and heat resistance over longer driving.
Wet Braking
For wet braking, I drive the test vehicle at an entry speed of 88 km/h and apply full braking effort to a standstill with ABS active on an asphalt surface with a controlled water film. I typically use an 80–5 km/h measurement window to isolate tyre performance from variability in the initial brake application. My standard programme is eight runs per tyre set where possible, although the sequence can extend to as many as fifteen runs if conditions and tyre category justify it. I analyse the full set of runs and discard statistical outliers before averaging. To correct for changing conditions, I run reference tyres repeatedly throughout the session — in wet testing, typically every three candidate test sets.
Wet Handling
For wet handling, I drive at the limit of adhesion around a dedicated handling circuit. I generally use specialist wet circuits with kerb-watering systems designed to maintain a consistent surface condition. ESC is disabled where possible so I can assess the tyre's natural balance, transient response, and limit behaviour without electronic intervention masking the result. I usually complete between two and five timed laps per tyre set, depending on the circuit, tyre type, and consistency of conditions. I exclude laps affected by clear driver error or obvious environmental inconsistency. Control runs are carried out frequently throughout the session, and I often use multiple sets of control tyres so that wear on the references does not become a meaningful variable.
Not being satisfied with just running dry handling, I'm going to test the tyres in wet handling, dry and wet braking, and of course the all important dry handling, to find out which tyre is fastest in which conditions.
Data
Front 265/35 R20 |
Rear 325/30 R21 |
|||||
| Tyre | DOT | Code | Weight | DOT | Code | Weight |
| Goodyear Eagle F1 SuperSport RS N0 | 1020 | DMBK JM1R | 11.05 | 3719 | DMCB JE1R | 14.29 |
| Michelin Pilot Sport Cup 2 R N0 | 3519 | 6U0F 0HEX | 11.14 | 0220 | 6U2U 00CX | 14.76 |
| Pirelli P Zero Trofeo R | 3819 | XJX0 V683 | 11.34 | 4219 | XJ19 V684 | 15.33 |
Dry
Dry Braking
Dry braking in meters
Lower is better ↓| Position / Tyre | Result | Gap to best |
|---|---|---|
| 43.55 m | Best | |
| 47.28 m | +3.73 m | |
| 48.48 m | +4.93 m |
The difference between best and worst was 11.3% (4.93 m ≈ 1.1 Car Lengths).
Dry Handling
Dry handling time in seconds
Lower is better ↓| Position / Tyre | Result | Gap to best |
|---|---|---|
| 63.2 s | Best | |
| 63.2 s | Best | |
| 64.9 s | +1.70 s |
All the tyres in the Dry Handling test finished less than 3% apart.

Wet
Wet Braking
Wet braking in meters
Lower is better ↓| Position / Tyre | Result | Gap to best |
|---|---|---|
| 38.15 m | Best | |
| 45.68 m | +7.53 m | |
| 50.73 m | +12.58 m |
The difference between best and worst was 33% (12.58 m ≈ 2.8 Car Lengths).
Wet Handling
Wet handling time in seconds
Lower is better ↓| Position / Tyre | Result | Gap to best |
|---|---|---|
| 106.47 s | Best | |
| 113.3 s | +6.83 s | |
| 116.87 s | +10.40 s |
The difference between best and worst was 9.8% (10.4 s).
Weight
Tyre Weight
Tyre Weight Per Set
Lower is better ↓| Position / Tyre | Result | Gap to best |
|---|---|---|
| 50.68 Kg | Best | |
| 51.8 Kg | +1.12 Kg | |
| 53.34 Kg | +2.66 Kg |
The difference between best and worst was 5.2% (2.66 Kg).
Results

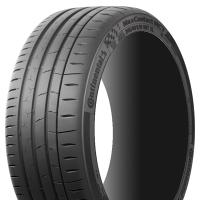
Michelin Pilot Sport Cup 2 R
325/30 R21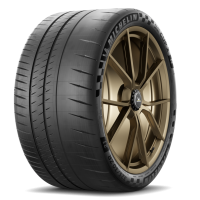
Category scores (% of best)
All discipline results (5)
Discipline positions compare the ranked tyres in this test, not the whole market. These are individual measurements, not weighted overall scores.
| Test | Position in discipline | Result | Gap to best |
|---|---|---|---|
| Dry BrakingLower is better | 1st / 3 | 43.55 m | Best in this discipline |
| Dry HandlingLower is better | 1st / 3 | 63.2 s | Best in this discipline |
| Wet BrakingLower is better | 2nd / 3 | 45.68 m | +7.53 m |
| Wet HandlingLower is better | 2nd / 3 | 113.3 s | +6.83 s |
| Tyre WeightLower is better | 2nd / 3 | 51.8 Kg | +1.12 Kg |
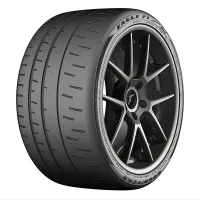
Goodyear Eagle F1 SuperSport RS
325/30 R21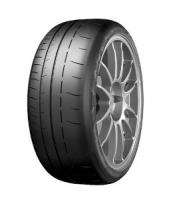
Category scores (% of best)
All discipline results (5)
Discipline positions compare the ranked tyres in this test, not the whole market. These are individual measurements, not weighted overall scores.
| Test | Position in discipline | Result | Gap to best |
|---|---|---|---|
| Dry BrakingLower is better | 2nd / 3 | 47.28 m | +3.73 m |
| Dry HandlingLower is better | 1st / 3 | 63.2 s | Best in this discipline |
| Wet BrakingLower is better | 3rd / 3 | 50.73 m | +12.58 m |
| Wet HandlingLower is better | 3rd / 3 | 116.87 s | +10.40 s |
| Tyre WeightLower is better | 1st / 3 | 50.68 Kg | Best in this discipline |
Pirelli P Zero Trofeo R
325/30 R21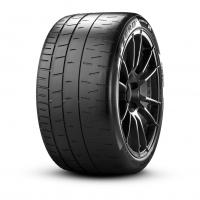
Category scores (% of best)
All discipline results (5)
Discipline positions compare the ranked tyres in this test, not the whole market. These are individual measurements, not weighted overall scores.
| Test | Position in discipline | Result | Gap to best |
|---|---|---|---|
| Dry BrakingLower is better | 3rd / 3 | 48.48 m | +4.93 m |
| Dry HandlingLower is better | 3rd / 3 | 64.9 s | +1.70 s |
| Wet BrakingLower is better | 1st / 3 | 38.15 m | Best in this discipline |
| Wet HandlingLower is better | 1st / 3 | 106.47 s | Best in this discipline |
| Tyre WeightLower is better | 3rd / 3 | 53.34 Kg | +2.66 Kg |
Please forgive my english.
I have watched the video yesterday, it was super informative with lots of datas and as usual the part I enjoy most was your subjective analysis and feedback. I must compliment you for making these videos really immersive and able to make us feel as if we were at the steering wheel appreciating the tyres and the enjoyment of driving a sport car.
Best regards
Thank you for taking the time to right, it is really appreciated. I'm glad you enjoyed the video!