



 Famously, ADAC are not fans of all season tyres, seeing them as too compromised for year round motoring and insisting that a summer and winter tyre combination is superior.
This means ADAC have not tested all season tyres since 2020, so lets see if the modern batch of all season tyres can change ADACs mind!
Test setup & methodology
The test setting, the conditions recorded and how the results contribute to the score.
Recorded test conditions
Recorded test conditions
- Dry Braking
- 100 → 0 km/h
- Wet Braking
- 80 → 0 km/h
- Wet Braking - Concrete
- 80 → 0 km/h
- Snow Braking
- 30 → 0 km/h
ADAC tested 16 all-season tyre models in the popular 205/55 R16 size, but sadly started their testing before the public availability of the new Continental AllSeasonContact 2 which won the tyre reviews test this year, the vastly improved Pirelli Cinturato All Season SF3 and the Bridgestone Turanza All Season 6. The tyres were assessed under various conditions including summer, winter, and wet scenarios, with the overall score comprising 70% for driving safety and 30% for environmental impact.
It seems modern all season tyres have improved, as an all-season tyre received a "good" overall rating for the first time. The Goodyear Vector 4Seasons Gen-3 claimed this honor, demonstrating good performance in wet and winter conditions, though showing slight weaknesses in dry summer conditions. Following closely was the Pirelli Cinturato All Season SF2, which proved to be an excellent choice for low-mileage drivers with good performance across all conditions.
While seven out of the 16 tyres tested were rated as "recommended," the remaining nine failed to meet the mark. Some tyres exhibited specific strengths in certain conditions but fell short in others, highlighting the ongoing challenge of creating a truly well-balanced all-season tyre.
Despite the improvements seen in some models, the test also exposed persistent issues. Seven tyres were rated only as "adequate," and two were deemed "poor," with many showing significant weaknesses particularly in dry conditions. This underscores that while progress has been made, all-season tyres are not yet universal all-rounders.
ADAC concludes that drivers should carefully consider their specific driving profile when choosing between all-season tyres and dedicated summer/winter tyres. The test emphasizes that performance, rather than price, should be the primary consideration in tyre selection. While all-season tyres have certainly improved, they may not be the optimal choice for all drivers or all driving conditions.
Dry
Without the new challengers from Continental, Pirelli and Bridgestone, dry braking was once again led by the Michelin Crossclimate 2, with the Uniroyal struggling to get the car slowed down, taking over 7 meters more to stop from 100km/h.
Dry Braking
Dry braking in meters (100 - 0 km/h)
Lower is better ↓| Position / Tyre | Result | Gap to best | Residual speed |
|---|---|---|---|
| 39.5 m | Best | 0 km/h | |
| 40.4 m | +0.90 m | 19 km/h | |
| 42.2 m | +2.70 m | 33 km/h | |
| 42.6 m | +3.10 m | 35 km/h | |
| 43.2 m | +3.70 m | 38 km/h | |
| 43.2 m | +3.70 m | 38 km/h | |
| 44.1 m | +4.60 m | 42 km/h | |
| 44.1 m | +4.60 m | 42 km/h | |
| 44.2 m | +4.70 m | 42 km/h | |
| 44.6 m | +5.10 m | 44 km/h | |
| 44.8 m | +5.30 m | 45 km/h | |
| 44.9 m | +5.40 m | 45 km/h | |
| 45 m | +5.50 m | 45 km/h | |
| 45.9 m | +6.40 m | 49 km/h | |
| 46.1 m | +6.60 m | 49 km/h | |
| 46.6 m | +7.10 m | 51 km/h |
The difference between best and worst was 18% (7.1 m ≈ 1.6 Car Lengths). From 130 km/h, the Uniroyal AllSeasonExpert 2 would still be travelling at 51 km/h when the Michelin CrossClimate 2 had stopped.
Residual speed is calculated from the measured braking distances, assuming constant deceleration; it is not a separate measurement.
Wet
In wet braking, the Pirelli Cinturato All Season SF2 took the top spot, while the Infinity Ecofour lagged behind, needing over 5 meters more to come to a stop from 80 km/h.
Wet Braking
Wet braking in meters (80 - 0 km/h)
Lower is better ↓| Position / Tyre | Result | Gap to best | Residual speed |
|---|---|---|---|
| 33.3 m | Best | 0 km/h | |
| 33.6 m | +0.30 m | 12 km/h | |
| 34.4 m | +1.10 m | 23 km/h | |
| 34.7 m | +1.40 m | 26 km/h | |
| 34.8 m | +1.50 m | 27 km/h | |
| 35 m | +1.70 m | 29 km/h | |
| 35 m | +1.70 m | 29 km/h | |
| 35.1 m | +1.80 m | 29 km/h | |
| 35.3 m | +2.00 m | 31 km/h | |
| 35.9 m | +2.60 m | 35 km/h | |
| 36.1 m | +2.80 m | 36 km/h | |
| 36.4 m | +3.10 m | 38 km/h | |
| 37.5 m | +4.20 m | 44 km/h | |
| 37.9 m | +4.60 m | 45 km/h | |
| 38.1 m | +4.80 m | 46 km/h | |
| 38.6 m | +5.30 m | 48 km/h |
The difference between best and worst was 15.9% (5.3 m ≈ 1.2 Car Lengths). From 130 km/h, the Infinity Ecofour would still be travelling at 48 km/h when the Pirelli Cinturato All Season SF2 had stopped.
Residual speed is calculated from the measured braking distances, assuming constant deceleration; it is not a separate measurement.
On concrete surfaces in wet conditions, the Pirelli Cinturato All Season SF2 maintained its lead, with the Infinity Ecofour again showing the poorest performance, requiring over 8 meters more to stop.
Wet Braking - Concrete
Wet braking on Concrete in meters (80 - 0 km/h)
Lower is better ↓| Position / Tyre | Result | Gap to best | Residual speed |
|---|---|---|---|
| 37.5 m | Best | 0 km/h | |
| 38.9 m | +1.40 m | 25 km/h | |
| 39.3 m | +1.80 m | 28 km/h | |
| 40 m | +2.50 m | 33 km/h | |
| 40 m | +2.50 m | 33 km/h | |
| 40.3 m | +2.80 m | 34 km/h | |
| 40.6 m | +3.10 m | 36 km/h | |
| 40.8 m | +3.30 m | 37 km/h | |
| 41.1 m | +3.60 m | 38 km/h | |
| 41.3 m | +3.80 m | 39 km/h | |
| 42.3 m | +4.80 m | 44 km/h | |
| 43.1 m | +5.60 m | 47 km/h | |
| 43.2 m | +5.70 m | 47 km/h | |
| 43.9 m | +6.40 m | 50 km/h | |
| 44.5 m | +7.00 m | 52 km/h | |
| 45.9 m | +8.40 m | 56 km/h |
The difference between best and worst was 22.4% (8.4 m ≈ 1.9 Car Lengths). From 130 km/h, the Infinity Ecofour would still be travelling at 56 km/h when the Pirelli Cinturato All Season SF2 had stopped.
Residual speed is calculated from the measured braking distances, assuming constant deceleration; it is not a separate measurement.
In straight aquaplaning tests, the Uniroyal AllSeasonExpert 2 once again showed its deep water abilities by achieving the highest float speed, while the Infinity Ecofour struggled, with a float speed nearly 13 km/h lower.
Straight Aqua
Float Speed in Km/H
Higher is better ↑| Position / Tyre | Result | Gap to best |
|---|---|---|
| 82.3 km/h | Best | |
| 81 km/h | -1.30 km/h | |
| 81 km/h | -1.30 km/h | |
| 80.8 km/h | -1.50 km/h | |
| 79.3 km/h | -3.00 km/h | |
| 78.7 km/h | -3.60 km/h | |
| 78.6 km/h | -3.70 km/h | |
| 78.4 km/h | -3.90 km/h | |
| 77.8 km/h | -4.50 km/h | |
| 77.8 km/h | -4.50 km/h | |
| 77.7 km/h | -4.60 km/h | |
| 74.8 km/h | -7.50 km/h | |
| 74 km/h | -8.30 km/h | |
| 73.4 km/h | -8.90 km/h | |
| 72.3 km/h | -10.00 km/h | |
| 69.4 km/h | -12.90 km/h |
The difference between best and worst was 15.7% (12.9 Km/H).
The Uniroyal AllSeasonExpert 2 continued to impress in deep water, leading the curved aquaplaning test, while the Infinity Ecofour showed the least resistance to aquaplaning in curves.
Curved Aquaplaning
Remaining lateral acceleration
Higher is better ↑| Position / Tyre | Result | Gap to best |
|---|---|---|
| 3.6 m/sec2 | Best | |
| 3.4 m/sec2 | -0.20 m/sec2 | |
| 3.4 m/sec2 | -0.20 m/sec2 | |
| 3.3 m/sec2 | -0.30 m/sec2 | |
| 3.3 m/sec2 | -0.30 m/sec2 | |
| 3.3 m/sec2 | -0.30 m/sec2 | |
| 3.3 m/sec2 | -0.30 m/sec2 | |
| 3.3 m/sec2 | -0.30 m/sec2 | |
| 3.2 m/sec2 | -0.40 m/sec2 | |
| 3 m/sec2 | -0.60 m/sec2 | |
| 2.9 m/sec2 | -0.70 m/sec2 | |
| 2.8 m/sec2 | -0.80 m/sec2 | |
| 2.8 m/sec2 | -0.80 m/sec2 | |
| 2.6 m/sec2 | -1.00 m/sec2 | |
| 2.5 m/sec2 | -1.10 m/sec2 | |
| 2.4 m/sec2 | -1.20 m/sec2 |
The difference between best and worst was 33.3% (1.2 m/sec2).
Snow
In snow braking tests, the Semperit AllSeason Grip proved most effective, while the Pirelli Cinturato All Season SF2, despite its strong wet performance, required 2 meters more to stop on snow.
Snow Braking
Snow braking in meters (30 - 0 km/h)
Lower is better ↓| Position / Tyre | Result | Gap to best | Residual speed |
|---|---|---|---|
| 10 m | Best | 0 km/h | |
| 10.4 m | +0.40 m | 25 km/h | |
| 10.5 m | +0.50 m | 28 km/h | |
| 10.6 m | +0.60 m | 31 km/h | |
| 10.7 m | +0.70 m | 33 km/h | |
| 10.7 m | +0.70 m | 33 km/h | |
| 10.7 m | +0.70 m | 33 km/h | |
| 11.1 m | +1.10 m | 41 km/h | |
| 11.4 m | +1.40 m | 46 km/h | |
| 11.4 m | +1.40 m | 46 km/h | |
| 11.4 m | +1.40 m | 46 km/h | |
| 11.4 m | +1.40 m | 46 km/h | |
| 11.6 m | +1.60 m | 48 km/h | |
| 11.7 m | +1.70 m | 50 km/h | |
| 11.9 m | +1.90 m | 52 km/h | |
| 12 m | +2.00 m | 53 km/h |
The difference between best and worst was 20% (2 m ≈ 0.4 Car Lengths). From 130 km/h, the Pirelli Cinturato All Season SF2 would still be travelling at 53 km/h when the Semperit AllSeason Grip had stopped.
Residual speed is calculated from the measured braking distances, assuming constant deceleration; it is not a separate measurement.
The Sava All Weather demonstrated the best snow traction, while the Kenda Kenetica 4S struggled to gain grip, producing over 40 N less pulling force.
Snow Traction
Pulling Force in Newtons
Higher is better ↑| Position / Tyre | Result | Gap to best |
|---|---|---|
| 234.1 N | Best | |
| 228.1 N | -6.00 N | |
| 225.5 N | -8.60 N | |
| 223.2 N | -10.90 N | |
| 218.5 N | -15.60 N | |
| 217.6 N | -16.50 N | |
| 217.6 N | -16.50 N | |
| 216.9 N | -17.20 N | |
| 212.5 N | -21.60 N | |
| 212.3 N | -21.80 N | |
| 210.9 N | -23.20 N | |
| 210.4 N | -23.70 N | |
| 209.7 N | -24.40 N | |
| 200 N | -34.10 N | |
| 191.4 N | -42.70 N | |
| 191.2 N | -42.90 N |
The difference between best and worst was 18.3% (42.9 N).
Ice
On icy surfaces, the Pirelli Cinturato All Season SF2 redeemed itself with the shortest braking distance, while the Kenda Kenetica 4S required 4 meters more to come to a stop.
Ice Braking
Ice braking in meters
Lower is better ↓| Position / Tyre | Result | Gap to best |
|---|---|---|
| 18 m | Best | |
| 18.1 m | +0.10 m | |
| 18.5 m | +0.50 m | |
| 18.7 m | +0.70 m | |
| 19 m | +1.00 m | |
| 19.2 m | +1.20 m | |
| 19.6 m | +1.60 m | |
| 19.6 m | +1.60 m | |
| 19.7 m | +1.70 m | |
| 19.8 m | +1.80 m | |
| 20.4 m | +2.40 m | |
| 20.5 m | +2.50 m | |
| 21 m | +3.00 m | |
| 21.2 m | +3.20 m | |
| 21.2 m | +3.20 m | |
| 22 m | +4.00 m |
The difference between best and worst was 22.2% (4 m ≈ 0.9 Car Lengths).

Comfort
In terms of external noise, the Nankang Cross Seasons AW6, Pirelli Cinturato All Season SF2, and Goodyear Vector 4Seasons Gen 3 tied for the quietest performance, while the Falken EUROALL SEASON AS210 was the noisiest.
Noise
External noise in dB
Lower is better ↓| Position / Tyre | Result | Gap to best |
|---|---|---|
| 70.6 dB | Best | |
| 70.6 dB | Best | |
| 70.6 dB | Best | |
| 71.1 dB | +0.50 dB | |
| 71.1 dB | +0.50 dB | |
| 71.4 dB | +0.80 dB | |
| 71.4 dB | +0.80 dB | |
| 71.4 dB | +0.80 dB | |
| 71.4 dB | +0.80 dB | |
| 71.5 dB | +0.90 dB | |
| 71.5 dB | +0.90 dB | |
| 71.9 dB | +1.30 dB | |
| 71.9 dB | +1.30 dB | |
| 72.1 dB | +1.50 dB | |
| 72.2 dB | +1.60 dB | |
| 72.3 dB | +1.70 dB |
All the tyres in the Noise test finished less than 3% apart.
The Sava All Weather proved to be the lightest tyre in the test, while the Yokohama BluEarth 4S AW21 was the heaviest, weighing over 2 kg more per tyre.
Tyre Weight
Tyre Weight Per Set
Lower is better ↓| Position / Tyre | Result | Gap to best |
|---|---|---|
| 7.9 Kg | Best | |
| 8 Kg | +0.10 Kg | |
| 8 Kg | +0.10 Kg | |
| 8.1 Kg | +0.20 Kg | |
| 8.2 Kg | +0.30 Kg | |
| 8.3 Kg | +0.40 Kg | |
| 8.4 Kg | +0.50 Kg | |
| 8.4 Kg | +0.50 Kg | |
| 8.5 Kg | +0.60 Kg | |
| 8.7 Kg | +0.80 Kg | |
| 8.8 Kg | +0.90 Kg | |
| 8.9 Kg | +1.00 Kg | |
| 9.1 Kg | +1.20 Kg | |
| 9.1 Kg | +1.20 Kg | |
| 9.9 Kg | +2.00 Kg | |
| 10.1 Kg | +2.20 Kg |
The difference between best and worst was 27.8% (2.2 Kg).
Value
In the wear test, the Goodyear Vector 4Seasons Gen 3 showed impressive longevity with a projected lifespan of over 60,000 km, nearly double that of the least durable tyre, the Pirelli Cinturato All Season SF2.
Wear
Predicted tread life in KM
Higher is better ↑| Position / Tyre | Result | Gap to best |
|---|---|---|
| 60,700 KM | Best | |
| 51,500 KM | -9,200 KM | |
| 50,600 KM | -10,100 KM | |
| 50,200 KM | -10,500 KM | |
| 48,000 KM | -12,700 KM | |
| 48,000 KM | -12,700 KM | |
| 44,400 KM | -16,300 KM | |
| 44,000 KM | -16,700 KM | |
| 43,600 KM | -17,100 KM | |
| 42,700 KM | -18,000 KM | |
| 41,800 KM | -18,900 KM | |
| 40,000 KM | -20,700 KM | |
| 37,400 KM | -23,300 KM | |
| 35,600 KM | -25,100 KM | |
| 33,900 KM | -26,800 KM | |
| 33,000 KM | -27,700 KM |
The difference between best and worst was 45.6% (27,700 KM).
The Vredestein Quatrac, Sava All Weather, and Infinity Ecofour tied for the best fuel efficiency, while the Kenda Kenetica 4S and Yokohama BluEarth 4S AW21 were the least efficient, consuming 0.3 l/100km more.
Fuel Consumption
Fuel consumption in Litres per 100 km
Lower is better ↓| Position / Tyre | Result | Gap to best | Extra fuel / year |
|---|---|---|---|
| 5.2 l/100km | Best | £0 | |
| 5.2 l/100km | Best | £0 | |
| 5.2 l/100km | Best | £0 | |
| 5.3 l/100km | +0.10 l/100km | £28 | |
| 5.3 l/100km | +0.10 l/100km | £28 | |
| 5.3 l/100km | +0.10 l/100km | £28 | |
| 5.3 l/100km | +0.10 l/100km | £28 | |
| 5.4 l/100km | +0.20 l/100km | £55 | |
| 5.4 l/100km | +0.20 l/100km | £55 | |
| 5.4 l/100km | +0.20 l/100km | £55 | |
| 5.4 l/100km | +0.20 l/100km | £55 | |
| 5.4 l/100km | +0.20 l/100km | £55 | |
| 5.4 l/100km | +0.20 l/100km | £55 | |
| 5.41 l/100km | +0.21 l/100km | £58 | |
| 5.5 l/100km | +0.30 l/100km | £83 | |
| 5.5 l/100km | +0.30 l/100km | £83 |
The difference between best and worst was 5.8% (0.3 l/100km). Over 19,000 km a year at £1.45/L, the Yokohama BluEarth 4S AW21 uses about 57 L (£83) more fuel than the Infinity Ecofour.
Adjust the assumptions
Calculated estimates, not additional measurements. Use the controls to explore the assumptions.
The Michelin CrossClimate 2 showed the least tyre wear particles lost, indicating good compound durability, while the Yokohama BluEarth 4S AW21 lost nearly twice as much material during testing.
Abrasion
Weight of Tyre Wear Particles Lost (mg/km/t)
Lower is better ↓| Position / Tyre | Result | Gap to best |
|---|---|---|
| 52 mg/km/t | Best | |
| 56 mg/km/t | +4.00 mg/km/t | |
| 56 mg/km/t | +4.00 mg/km/t | |
| 57 mg/km/t | +5.00 mg/km/t | |
| 59 mg/km/t | +7.00 mg/km/t | |
| 59 mg/km/t | +7.00 mg/km/t | |
| 60 mg/km/t | +8.00 mg/km/t | |
| 63 mg/km/t | +11.00 mg/km/t | |
| 69 mg/km/t | +17.00 mg/km/t | |
| 71 mg/km/t | +19.00 mg/km/t | |
| 72 mg/km/t | +20.00 mg/km/t | |
| 74 mg/km/t | +22.00 mg/km/t | |
| 77 mg/km/t | +25.00 mg/km/t | |
| 88 mg/km/t | +36.00 mg/km/t | |
| 88 mg/km/t | +36.00 mg/km/t | |
| 92 mg/km/t | +40.00 mg/km/t |
The difference between best and worst was 76.9% (40 mg/km/t).
Tyre Reviews All Season Tyre Tests
Results
Goodyear Vector 4Seasons Gen 3
205/55 R16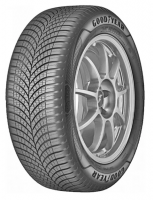
Category scores (% of best)
All discipline results (13)
Discipline positions compare the ranked tyres in this test, not the whole market. These are individual measurements, not weighted overall scores.
| Test | Position in discipline | Result | Gap to best |
|---|---|---|---|
| Dry BrakingLower is better | 5th / 16 | 43.2 m | +3.70 m |
| Wet BrakingLower is better | 4th / 16 | 34.7 m | +1.40 m |
| Wet Braking - ConcreteLower is better | 4th / 16 | 40 m | +2.50 m |
| Straight AquaHigher is better | 5th / 16 | 79.3 km/h | -3.00 km/h |
| Curved AquaplaningHigher is better | 2nd / 16 | 3.4 m/sec2 | -0.20 m/sec2 |
| Snow BrakingLower is better | 5th / 16 | 10.7 m | +0.70 m |
| Snow TractionHigher is better | 5th / 16 | 218.5 N | -15.60 N |
| Ice BrakingLower is better | 4th / 16 | 18.7 m | +0.70 m |
| NoiseLower is better | 1st / 16 | 70.6 dB | Best in this discipline |
| Tyre WeightLower is better | 2nd / 16 | 8 Kg | +0.10 Kg |
| WearHigher is better | 1st / 16 | 60700 KM | Best in this discipline |
| Fuel ConsumptionLower is better | 8th / 16 | 5.4 l/100km | +0.20 l/100km |
| AbrasionLower is better | 4th / 16 | 57 mg/km/t | +5.00 mg/km/t |
- EU Label
- C/B/70
- 3PMSF
- Yes
Pirelli Cinturato All Season SF2
205/55 R16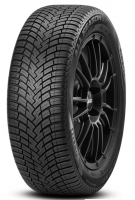
Category scores (% of best)
All discipline results (13)
Discipline positions compare the ranked tyres in this test, not the whole market. These are individual measurements, not weighted overall scores.
| Test | Position in discipline | Result | Gap to best |
|---|---|---|---|
| Dry BrakingLower is better | 2nd / 16 | 40.4 m | +0.90 m |
| Wet BrakingLower is better | 1st / 16 | 33.3 m | Best in this discipline |
| Wet Braking - ConcreteLower is better | 1st / 16 | 37.5 m | Best in this discipline |
| Straight AquaHigher is better | 2nd / 16 | 81 km/h | -1.30 km/h |
| Curved AquaplaningHigher is better | 4th / 16 | 3.3 m/sec2 | -0.30 m/sec2 |
| Snow BrakingLower is better | 16th / 16 | 12 m | +2.00 m |
| Snow TractionHigher is better | 13th / 16 | 209.7 N | -24.40 N |
| Ice BrakingLower is better | 1st / 16 | 18 m | Best in this discipline |
| NoiseLower is better | 1st / 16 | 70.6 dB | Best in this discipline |
| Tyre WeightLower is better | 13th / 16 | 9.1 Kg | +1.20 Kg |
| WearHigher is better | 16th / 16 | 33000 KM | -27,700.00 KM |
| Fuel ConsumptionLower is better | 8th / 16 | 5.4 l/100km | +0.20 l/100km |
| AbrasionLower is better | 11th / 16 | 72 mg/km/t | +20.00 mg/km/t |
- EU Label
- C/A/68
- 3PMSF
- Yes
Hankook Kinergy 4S2
205/55 R16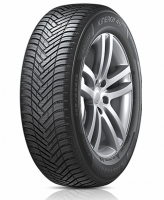
Category scores (% of best)
All discipline results (13)
Discipline positions compare the ranked tyres in this test, not the whole market. These are individual measurements, not weighted overall scores.
| Test | Position in discipline | Result | Gap to best |
|---|---|---|---|
| Dry BrakingLower is better | 4th / 16 | 42.6 m | +3.10 m |
| Wet BrakingLower is better | 10th / 16 | 35.9 m | +2.60 m |
| Wet Braking - ConcreteLower is better | 11th / 16 | 42.3 m | +4.80 m |
| Straight AquaHigher is better | 11th / 16 | 77.7 km/h | -4.60 km/h |
| Curved AquaplaningHigher is better | 4th / 16 | 3.3 m/sec2 | -0.30 m/sec2 |
| Snow BrakingLower is better | 9th / 16 | 11.4 m | +1.40 m |
| Snow TractionHigher is better | 8th / 16 | 216.9 N | -17.20 N |
| Ice BrakingLower is better | 13th / 16 | 21 m | +3.00 m |
| NoiseLower is better | 14th / 16 | 72.1 dB | +1.50 dB |
| Tyre WeightLower is better | 9th / 16 | 8.5 Kg | +0.60 Kg |
| WearHigher is better | 2nd / 16 | 51500 KM | -9,200.00 KM |
| Fuel ConsumptionLower is better | 8th / 16 | 5.4 l/100km | +0.20 l/100km |
| AbrasionLower is better | 2nd / 16 | 56 mg/km/t | +4.00 mg/km/t |
- EU Label
- C/B/72
- 3PMSF
- Yes
Michelin CrossClimate 2
205/55 R16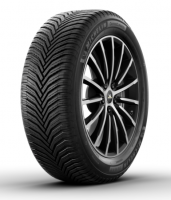
Category scores (% of best)
All discipline results (13)
Discipline positions compare the ranked tyres in this test, not the whole market. These are individual measurements, not weighted overall scores.
| Test | Position in discipline | Result | Gap to best |
|---|---|---|---|
| Dry BrakingLower is better | 1st / 16 | 39.5 m | Best in this discipline |
| Wet BrakingLower is better | 5th / 16 | 34.8 m | +1.50 m |
| Wet Braking - ConcreteLower is better | 9th / 16 | 41.1 m | +3.60 m |
| Straight AquaHigher is better | 2nd / 16 | 81 km/h | -1.30 km/h |
| Curved AquaplaningHigher is better | 9th / 16 | 3.2 m/sec2 | -0.40 m/sec2 |
| Snow BrakingLower is better | 8th / 16 | 11.1 m | +1.10 m |
| Snow TractionHigher is better | 3rd / 16 | 225.5 N | -8.60 N |
| Ice BrakingLower is better | 10th / 16 | 19.8 m | +1.80 m |
| NoiseLower is better | 4th / 16 | 71.1 dB | +0.50 dB |
| Tyre WeightLower is better | 6th / 16 | 8.3 Kg | +0.40 Kg |
| WearHigher is better | 8th / 16 | 44000 KM | -16,700.00 KM |
| Fuel ConsumptionLower is better | 4th / 16 | 5.3 l/100km | +0.10 l/100km |
| AbrasionLower is better | 1st / 16 | 52 mg/km/t | Best in this discipline |
- EU Label
- B/B/69
- 3PMSF
- Yes
Kumho Solus 4S HA32+
205/55 R16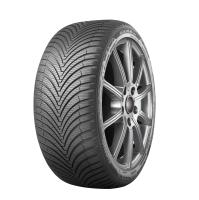
Category scores (% of best)
All discipline results (13)
Discipline positions compare the ranked tyres in this test, not the whole market. These are individual measurements, not weighted overall scores.
| Test | Position in discipline | Result | Gap to best |
|---|---|---|---|
| Dry BrakingLower is better | 7th / 16 | 44.1 m | +4.60 m |
| Wet BrakingLower is better | 8th / 16 | 35.1 m | +1.80 m |
| Wet Braking - ConcreteLower is better | 7th / 16 | 40.6 m | +3.10 m |
| Straight AquaHigher is better | 14th / 16 | 73.4 km/h | -8.90 km/h |
| Curved AquaplaningHigher is better | 14th / 16 | 2.6 m/sec2 | -1.00 m/sec2 |
| Snow BrakingLower is better | 4th / 16 | 10.6 m | +0.60 m |
| Snow TractionHigher is better | 4th / 16 | 223.2 N | -10.90 N |
| Ice BrakingLower is better | 7th / 16 | 19.6 m | +1.60 m |
| NoiseLower is better | 12th / 16 | 71.9 dB | +1.30 dB |
| Tyre WeightLower is better | 12th / 16 | 8.9 Kg | +1.00 Kg |
| WearHigher is better | 3rd / 16 | 50600 KM | -10,100.00 KM |
| Fuel ConsumptionLower is better | 8th / 16 | 5.4 l/100km | +0.20 l/100km |
| AbrasionLower is better | 9th / 16 | 69 mg/km/t | +17.00 mg/km/t |
- EU Label
- C/B/72
- 3PMSF
- Yes
Vredestein Quatrac
205/55 R16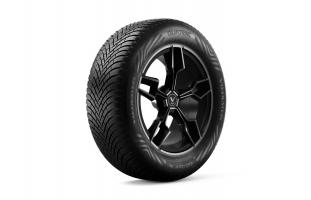
Category scores (% of best)
All discipline results (13)
Discipline positions compare the ranked tyres in this test, not the whole market. These are individual measurements, not weighted overall scores.
| Test | Position in discipline | Result | Gap to best |
|---|---|---|---|
| Dry BrakingLower is better | 3rd / 16 | 42.2 m | +2.70 m |
| Wet BrakingLower is better | 6th / 16 | 35 m | +1.70 m |
| Wet Braking - ConcreteLower is better | 4th / 16 | 40 m | +2.50 m |
| Straight AquaHigher is better | 6th / 16 | 78.7 km/h | -3.60 km/h |
| Curved AquaplaningHigher is better | 4th / 16 | 3.3 m/sec2 | -0.30 m/sec2 |
| Snow BrakingLower is better | 13th / 16 | 11.6 m | +1.60 m |
| Snow TractionHigher is better | 6th / 16 | 217.6 N | -16.50 N |
| Ice BrakingLower is better | 11th / 16 | 20.4 m | +2.40 m |
| NoiseLower is better | 4th / 16 | 71.1 dB | +0.50 dB |
| Tyre WeightLower is better | 5th / 16 | 8.2 Kg | +0.30 Kg |
| WearHigher is better | 5th / 16 | 48000 KM | -12,700.00 KM |
| Fuel ConsumptionLower is better | 1st / 16 | 5.2 l/100km | Best in this discipline |
| AbrasionLower is better | 7th / 16 | 60 mg/km/t | +8.00 mg/km/t |
- EU Label
- C/B/70
- 3PMSF
- Yes
Falken EUROALL SEASON AS210
205/55 R16
Category scores (% of best)
All discipline results (13)
Discipline positions compare the ranked tyres in this test, not the whole market. These are individual measurements, not weighted overall scores.
| Test | Position in discipline | Result | Gap to best |
|---|---|---|---|
| Dry BrakingLower is better | 7th / 16 | 44.1 m | +4.60 m |
| Wet BrakingLower is better | 3rd / 16 | 34.4 m | +1.10 m |
| Wet Braking - ConcreteLower is better | 2nd / 16 | 38.9 m | +1.40 m |
| Straight AquaHigher is better | 4th / 16 | 80.8 km/h | -1.50 km/h |
| Curved AquaplaningHigher is better | 2nd / 16 | 3.4 m/sec2 | -0.20 m/sec2 |
| Snow BrakingLower is better | 9th / 16 | 11.4 m | +1.40 m |
| Snow TractionHigher is better | 14th / 16 | 200 N | -34.10 N |
| Ice BrakingLower is better | 12th / 16 | 20.5 m | +2.50 m |
| NoiseLower is better | 16th / 16 | 72.3 dB | +1.70 dB |
| Tyre WeightLower is better | 11th / 16 | 8.8 Kg | +0.90 Kg |
| WearHigher is better | 12th / 16 | 40000 KM | -20,700.00 KM |
| Fuel ConsumptionLower is better | 8th / 16 | 5.4 l/100km | +0.20 l/100km |
| AbrasionLower is better | 12th / 16 | 74 mg/km/t | +22.00 mg/km/t |
- EU Label
- C/B/70
- 3PMSF
- Yes
Firestone MultiSeason Gen 02
205/55 R16
Category scores (% of best)
All discipline results (13)
Discipline positions compare the ranked tyres in this test, not the whole market. These are individual measurements, not weighted overall scores.
| Test | Position in discipline | Result | Gap to best |
|---|---|---|---|
| Dry BrakingLower is better | 9th / 16 | 44.2 m | +4.70 m |
| Wet BrakingLower is better | 2nd / 16 | 33.6 m | +0.30 m |
| Wet Braking - ConcreteLower is better | 3rd / 16 | 39.3 m | +1.80 m |
| Straight AquaHigher is better | 9th / 16 | 77.8 km/h | -4.50 km/h |
| Curved AquaplaningHigher is better | 12th / 16 | 2.8 m/sec2 | -0.80 m/sec2 |
| Snow BrakingLower is better | 9th / 16 | 11.4 m | +1.40 m |
| Snow TractionHigher is better | 12th / 16 | 210.4 N | -23.70 N |
| Ice BrakingLower is better | 7th / 16 | 19.6 m | +1.60 m |
| NoiseLower is better | 10th / 16 | 71.5 dB | +0.90 dB |
| Tyre WeightLower is better | 7th / 16 | 8.4 Kg | +0.50 Kg |
| WearHigher is better | 14th / 16 | 35600 KM | -25,100.00 KM |
| Fuel ConsumptionLower is better | 4th / 16 | 5.3 l/100km | +0.10 l/100km |
| AbrasionLower is better | 14th / 16 | 88 mg/km/t | +36.00 mg/km/t |
- EU Label
- C/B/71
- 3PMSF
- Yes
Sava Sava All Weather
205/55 R16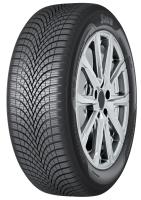
Category scores (% of best)
All discipline results (13)
Discipline positions compare the ranked tyres in this test, not the whole market. These are individual measurements, not weighted overall scores.
| Test | Position in discipline | Result | Gap to best |
|---|---|---|---|
| Dry BrakingLower is better | 13th / 16 | 45 m | +5.50 m |
| Wet BrakingLower is better | 15th / 16 | 38.1 m | +4.80 m |
| Wet Braking - ConcreteLower is better | 15th / 16 | 44.5 m | +7.00 m |
| Straight AquaHigher is better | 13th / 16 | 74 km/h | -8.30 km/h |
| Curved AquaplaningHigher is better | 10th / 16 | 3 m/sec2 | -0.60 m/sec2 |
| Snow BrakingLower is better | 2nd / 16 | 10.4 m | +0.40 m |
| Snow TractionHigher is better | 1st / 16 | 234.1 N | Best in this discipline |
| Ice BrakingLower is better | 6th / 16 | 19.2 m | +1.20 m |
| NoiseLower is better | 6th / 16 | 71.4 dB | +0.80 dB |
| Tyre WeightLower is better | 1st / 16 | 7.9 Kg | Best in this discipline |
| WearHigher is better | 10th / 16 | 42700 KM | -18,000.00 KM |
| Fuel ConsumptionLower is better | 1st / 16 | 5.2 l/100km | Best in this discipline |
| AbrasionLower is better | 8th / 16 | 63 mg/km/t | +11.00 mg/km/t |
- EU Label
- C/C/71
- 3PMSF
- Yes
Nankang Cross Seasons AW6
205/55 R16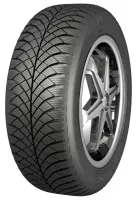
Category scores (% of best)
All discipline results (13)
Discipline positions compare the ranked tyres in this test, not the whole market. These are individual measurements, not weighted overall scores.
| Test | Position in discipline | Result | Gap to best |
|---|---|---|---|
| Dry BrakingLower is better | 10th / 16 | 44.6 m | +5.10 m |
| Wet BrakingLower is better | 14th / 16 | 37.9 m | +4.60 m |
| Wet Braking - ConcreteLower is better | 14th / 16 | 43.9 m | +6.40 m |
| Straight AquaHigher is better | 15th / 16 | 72.3 km/h | -10.00 km/h |
| Curved AquaplaningHigher is better | 15th / 16 | 2.5 m/sec2 | -1.10 m/sec2 |
| Snow BrakingLower is better | 5th / 16 | 10.7 m | +0.70 m |
| Snow TractionHigher is better | 9th / 16 | 212.5 N | -21.60 N |
| Ice BrakingLower is better | 5th / 16 | 19 m | +1.00 m |
| NoiseLower is better | 1st / 16 | 70.6 dB | Best in this discipline |
| Tyre WeightLower is better | 15th / 16 | 9.9 Kg | +2.00 Kg |
| WearHigher is better | 11th / 16 | 41800 KM | -18,900.00 KM |
| Fuel ConsumptionLower is better | 4th / 16 | 5.3 l/100km | +0.10 l/100km |
| AbrasionLower is better | 13th / 16 | 77 mg/km/t | +25.00 mg/km/t |
- EU Label
- C/B/72
- 3PMSF
- Yes
Toyo Celsius AS2
205/55 R16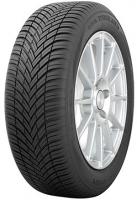
Category scores (% of best)
All discipline results (13)
Discipline positions compare the ranked tyres in this test, not the whole market. These are individual measurements, not weighted overall scores.
| Test | Position in discipline | Result | Gap to best |
|---|---|---|---|
| Dry BrakingLower is better | 5th / 16 | 43.2 m | +3.70 m |
| Wet BrakingLower is better | 12th / 16 | 36.4 m | +3.10 m |
| Wet Braking - ConcreteLower is better | 12th / 16 | 43.1 m | +5.60 m |
| Straight AquaHigher is better | 8th / 16 | 78.4 km/h | -3.90 km/h |
| Curved AquaplaningHigher is better | 4th / 16 | 3.3 m/sec2 | -0.30 m/sec2 |
| Snow BrakingLower is better | 14th / 16 | 11.7 m | +1.70 m |
| Snow TractionHigher is better | 15th / 16 | 191.4 N | -42.70 N |
| Ice BrakingLower is better | 14th / 16 | 21.2 m | +3.20 m |
| NoiseLower is better | 10th / 16 | 71.5 dB | +0.90 dB |
| Tyre WeightLower is better | 7th / 16 | 8.4 Kg | +0.50 Kg |
| WearHigher is better | 4th / 16 | 50200 KM | -10,500.00 KM |
| Fuel ConsumptionLower is better | 14th / 16 | 5.41 l/100km | +0.21 l/100km |
| AbrasionLower is better | 5th / 16 | 59 mg/km/t | +7.00 mg/km/t |
- EU Label
- C/B/71
- 3PMSF
- Yes
Semperit AllSeason Grip
205/55 R16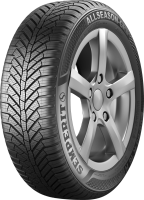
Category scores (% of best)
All discipline results (13)
Discipline positions compare the ranked tyres in this test, not the whole market. These are individual measurements, not weighted overall scores.
| Test | Position in discipline | Result | Gap to best |
|---|---|---|---|
| Dry BrakingLower is better | 14th / 16 | 45.9 m | +6.40 m |
| Wet BrakingLower is better | 9th / 16 | 35.3 m | +2.00 m |
| Wet Braking - ConcreteLower is better | 6th / 16 | 40.3 m | +2.80 m |
| Straight AquaHigher is better | 9th / 16 | 77.8 km/h | -4.50 km/h |
| Curved AquaplaningHigher is better | 11th / 16 | 2.9 m/sec2 | -0.70 m/sec2 |
| Snow BrakingLower is better | 1st / 16 | 10 m | Best in this discipline |
| Snow TractionHigher is better | 2nd / 16 | 228.1 N | -6.00 N |
| Ice BrakingLower is better | 2nd / 16 | 18.1 m | +0.10 m |
| NoiseLower is better | 6th / 16 | 71.4 dB | +0.80 dB |
| Tyre WeightLower is better | 4th / 16 | 8.1 Kg | +0.20 Kg |
| WearHigher is better | 13th / 16 | 37400 KM | -23,300.00 KM |
| Fuel ConsumptionLower is better | 8th / 16 | 5.4 l/100km | +0.20 l/100km |
| AbrasionLower is better | 14th / 16 | 88 mg/km/t | +36.00 mg/km/t |
- EU Label
- C/B/71
- 3PMSF
- Yes
Uniroyal AllSeasonExpert 2
205/55 R16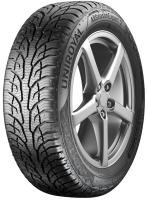
Category scores (% of best)
All discipline results (13)
Discipline positions compare the ranked tyres in this test, not the whole market. These are individual measurements, not weighted overall scores.
| Test | Position in discipline | Result | Gap to best |
|---|---|---|---|
| Dry BrakingLower is better | 16th / 16 | 46.6 m | +7.10 m |
| Wet BrakingLower is better | 6th / 16 | 35 m | +1.70 m |
| Wet Braking - ConcreteLower is better | 8th / 16 | 40.8 m | +3.30 m |
| Straight AquaHigher is better | 1st / 16 | 82.3 km/h | Best in this discipline |
| Curved AquaplaningHigher is better | 1st / 16 | 3.6 m/sec2 | Best in this discipline |
| Snow BrakingLower is better | 5th / 16 | 10.7 m | +0.70 m |
| Snow TractionHigher is better | 6th / 16 | 217.6 N | -16.50 N |
| Ice BrakingLower is better | 3rd / 16 | 18.5 m | +0.50 m |
| NoiseLower is better | 6th / 16 | 71.4 dB | +0.80 dB |
| Tyre WeightLower is better | 2nd / 16 | 8 Kg | +0.10 Kg |
| WearHigher is better | 5th / 16 | 48000 KM | -12,700.00 KM |
| Fuel ConsumptionLower is better | 4th / 16 | 5.3 l/100km | +0.10 l/100km |
| AbrasionLower is better | 10th / 16 | 71 mg/km/t | +19.00 mg/km/t |
- EU Label
- C/B/72
- 3PMSF
- Yes
Yokohama BluEarth 4S AW21
205/55 R16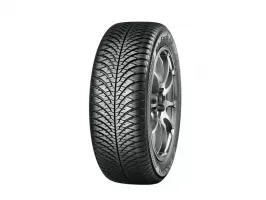
Category scores (% of best)
All discipline results (13)
Discipline positions compare the ranked tyres in this test, not the whole market. These are individual measurements, not weighted overall scores.
| Test | Position in discipline | Result | Gap to best |
|---|---|---|---|
| Dry BrakingLower is better | 15th / 16 | 46.1 m | +6.60 m |
| Wet BrakingLower is better | 11th / 16 | 36.1 m | +2.80 m |
| Wet Braking - ConcreteLower is better | 10th / 16 | 41.3 m | +3.80 m |
| Straight AquaHigher is better | 12th / 16 | 74.8 km/h | -7.50 km/h |
| Curved AquaplaningHigher is better | 12th / 16 | 2.8 m/sec2 | -0.80 m/sec2 |
| Snow BrakingLower is better | 3rd / 16 | 10.5 m | +0.50 m |
| Snow TractionHigher is better | 10th / 16 | 212.3 N | -21.80 N |
| Ice BrakingLower is better | 14th / 16 | 21.2 m | +3.20 m |
| NoiseLower is better | 15th / 16 | 72.2 dB | +1.60 dB |
| Tyre WeightLower is better | 16th / 16 | 10.1 Kg | +2.20 Kg |
| WearHigher is better | 15th / 16 | 33900 KM | -26,800.00 KM |
| Fuel ConsumptionLower is better | 15th / 16 | 5.5 l/100km | +0.30 l/100km |
| AbrasionLower is better | 16th / 16 | 92 mg/km/t | +40.00 mg/km/t |
- EU Label
- D/B/72
- 3PMSF
- Yes
Kenda Kenetica 4S
205/55 R16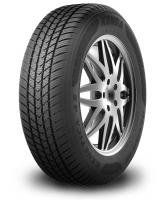
Category scores (% of best)
All discipline results (13)
Discipline positions compare the ranked tyres in this test, not the whole market. These are individual measurements, not weighted overall scores.
| Test | Position in discipline | Result | Gap to best |
|---|---|---|---|
| Dry BrakingLower is better | 11th / 16 | 44.8 m | +5.30 m |
| Wet BrakingLower is better | 13th / 16 | 37.5 m | +4.20 m |
| Wet Braking - ConcreteLower is better | 13th / 16 | 43.2 m | +5.70 m |
| Straight AquaHigher is better | 7th / 16 | 78.6 km/h | -3.70 km/h |
| Curved AquaplaningHigher is better | 4th / 16 | 3.3 m/sec2 | -0.30 m/sec2 |
| Snow BrakingLower is better | 15th / 16 | 11.9 m | +1.90 m |
| Snow TractionHigher is better | 16th / 16 | 191.2 N | -42.90 N |
| Ice BrakingLower is better | 16th / 16 | 22 m | +4.00 m |
| NoiseLower is better | 12th / 16 | 71.9 dB | +1.30 dB |
| Tyre WeightLower is better | 13th / 16 | 9.1 Kg | +1.20 Kg |
| WearHigher is better | 9th / 16 | 43600 KM | -17,100.00 KM |
| Fuel ConsumptionLower is better | 15th / 16 | 5.5 l/100km | +0.30 l/100km |
| AbrasionLower is better | 5th / 16 | 59 mg/km/t | +7.00 mg/km/t |
- EU Label
- D/C/70
- 3PMSF
- Yes
Infinity Ecofour
205/55 R16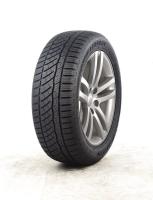
Category scores (% of best)
All discipline results (13)
Discipline positions compare the ranked tyres in this test, not the whole market. These are individual measurements, not weighted overall scores.
| Test | Position in discipline | Result | Gap to best |
|---|---|---|---|
| Dry BrakingLower is better | 12th / 16 | 44.9 m | +5.40 m |
| Wet BrakingLower is better | 16th / 16 | 38.6 m | +5.30 m |
| Wet Braking - ConcreteLower is better | 16th / 16 | 45.9 m | +8.40 m |
| Straight AquaHigher is better | 16th / 16 | 69.4 km/h | -12.90 km/h |
| Curved AquaplaningHigher is better | 16th / 16 | 2.4 m/sec2 | -1.20 m/sec2 |
| Snow BrakingLower is better | 9th / 16 | 11.4 m | +1.40 m |
| Snow TractionHigher is better | 11th / 16 | 210.9 N | -23.20 N |
| Ice BrakingLower is better | 9th / 16 | 19.7 m | +1.70 m |
| NoiseLower is better | 6th / 16 | 71.4 dB | +0.80 dB |
| Tyre WeightLower is better | 10th / 16 | 8.7 Kg | +0.80 Kg |
| WearHigher is better | 7th / 16 | 44400 KM | -16,300.00 KM |
| Fuel ConsumptionLower is better | 1st / 16 | 5.2 l/100km | Best in this discipline |
| AbrasionLower is better | 2nd / 16 | 56 mg/km/t | +4.00 mg/km/t |
- EU Label
- C/C/72
- 3PMSF
- Yes
Those who want to buy tires should be able to determine some parameters according to themselves. The result should be calculated accordingly. For example, the last 5 parameters are not important to me. Why don't you have a result without those parameters?
This is the only site in the world you can do that for yourself on.